
HOW DID YOU USE MEDIA TECHNOLOGIES IN THE CONSTRUCTION, RESEARCH, PLANNING AND EVALUATION STAGES?
INTRODUCTION
The evaluation of question 4 consists of the technologies that has been used throughout the beginning of our journey to create our horror trailer. The areas that will be covered is our 'planning and research', 'production' and 'post-production' periods specifying the all the elements that have been used such as devices, equipment, the internet, tools and software's. In order to create our three products, a teaser trailer, poster and magazine, we had to go through a number of steps to prepare and finally create our products. We used a number of different programs and software to make our way to the final products but we all started with the search engine 'Google' as it gave us many links to information and research for our planning and research stage. For our production stage we were then able to put our research into action by applying what we had learn't to our own product with the use of editing software's, equipment, planning and make up and costume. Finally we then went on to post-production so that we were able to evaluate the work and final pieces we had created with the use of screen shots, images and video tutorials to support our statements and overall work throughout the time when we had begun.
PLANNING & RESEARCH (DEVELOPMENT & PRE-PRODUCTION)
APPLE MACS (MACINTOSH) & WEEBLY - (DEVELOPMENT)

|

|
To begin our work in the use of media technologies we have consistently used the tool of an iMac Computer and a MacBook Pro laptop. These are products of the global and well known brand of apple which specialise in digital technologies. These were effective throughout the creation of our poster, magazine and trailer as they have played a vital role through every step of the way. These two products were especially useful as they specialised in editing and manipulating images and videos which helped us to save time and create our products to a much higher standard than a regular everyday household computer/ laptop.
To kick off our journey we began by creating our team website with the use of weebly. Weebly is an internet website which allows the use of web-hosting so that others are able to create their own website (Also known as a website builder). The use of weebly has played the most vital role throughout the creation of our products as it allowed us to document each and every piece of work which were created to achieve our final products. It was also helpful as we used it to keep a log of our meetings so that we had a record of events taken place and target deadlines.
To kick off our journey we began by creating our team website with the use of weebly. Weebly is an internet website which allows the use of web-hosting so that others are able to create their own website (Also known as a website builder). The use of weebly has played the most vital role throughout the creation of our products as it allowed us to document each and every piece of work which were created to achieve our final products. It was also helpful as we used it to keep a log of our meetings so that we had a record of events taken place and target deadlines.


|

|
When creating the logo for the team we originally had a skull with the colour scheme of red, black and white. However, we had to eventually change as it would be difficulty to present our logo on another coloured background. we then adopted the wolf and the moon after thinking of a howling sound. As we were looking for fonts, we searched through the two websites, 'DaFont' and '1001 fonts' which led me to find the font named 'Haunting Attractions' which was used to brand our logo text throughout our journey. We used photoshop to create our logo as we used the glow effect and shape tool to create the red glow outline and the glowing surrounding the text.
|


THE INTERNET - (DEVELOPMENT)

'Mozilla Firefox', 'Google Chrome' and 'Internet Explorer' are three of the most infamous internet browsers used around the globe. However, in the past we have faced issues using specific browsers such as 'Internet Explorer' which would not allow us to upload to weebly with specific computers. This led to us preferably using 'Google Chrome' and 'Mozilla Firefox' as they operated faster and had a much more sleek layout. The popular choice was 'Google Chrome' as it allowed us to operate our Gmail account and YouTube account as they are products of google allowing us to keep within the brand.

Web 2.0 is the second stage of the internets development which allows users to operate with a more interactive interface with the use of social networking. This is the more developed form of the previously static Web 1.0 as it brings forward a new generation of internet usage. However, soon to come is a predicted new Web 3.0 also known as 'The Semantic Web', which is thought to be the third generation of the world wide web that includes the semantic tagging of content. The semantic web is thought to bring across an evolution of the current web by allowing users to find, share and combine information more easily as it is currently unstructured and has potential to become a document filled with a web of data.
|


|

|

|


As we began to research for ideas and inspiration it all began with the popular search engine google which allows you to search and find useful data that can help to guide your frame of work. We used this by searching examples of real media texts, such as 'horror posters' or 'horror magazines'. this allowed us to analyse and document the general conventions of the real media text and incorporate it into our own work. In addition to this we had also used YouTube to search for examples of real media texts such as existing trailers. As YouTube is a product of google; it also provides a vast array of data as it allows user of the social networking site to post and view video footage. We decided to use this to our advantage by creating an account so that we could be able to post up videos as we lead up to the creation of our final products and document the development of our journey.
RESEARCH - (DEVELOPMENT)

|
During the initial research stage we had used the amateur video editing software known as 'Windows Movie Maker' to create an amateur trailer to test one of our ideas and how the structure of a trailer should be laid out. This helped us to be able to understand the concept of creating a trailer better and proved successful in our final product as we had learned from our mistakes and used the information we retained to improve our work.
|
MICROSOFT OFFICE - (DEVELOPMENT)

|

|

|

|

The use of the Microsoft Office softwares, 'Word, Powerpoint and Excel' helped to aid in the development stages of producing our work as it helped in creating our textual analyse's, presenting our concepts and creating charts of our results or feedback. This software proved to be a valuable tool as its structure helped in documenting our work as a visual content.
|
DEVICES & EQUIPMENT - (DEVELOPMENT & PRE-PRODUCTION)
|

|
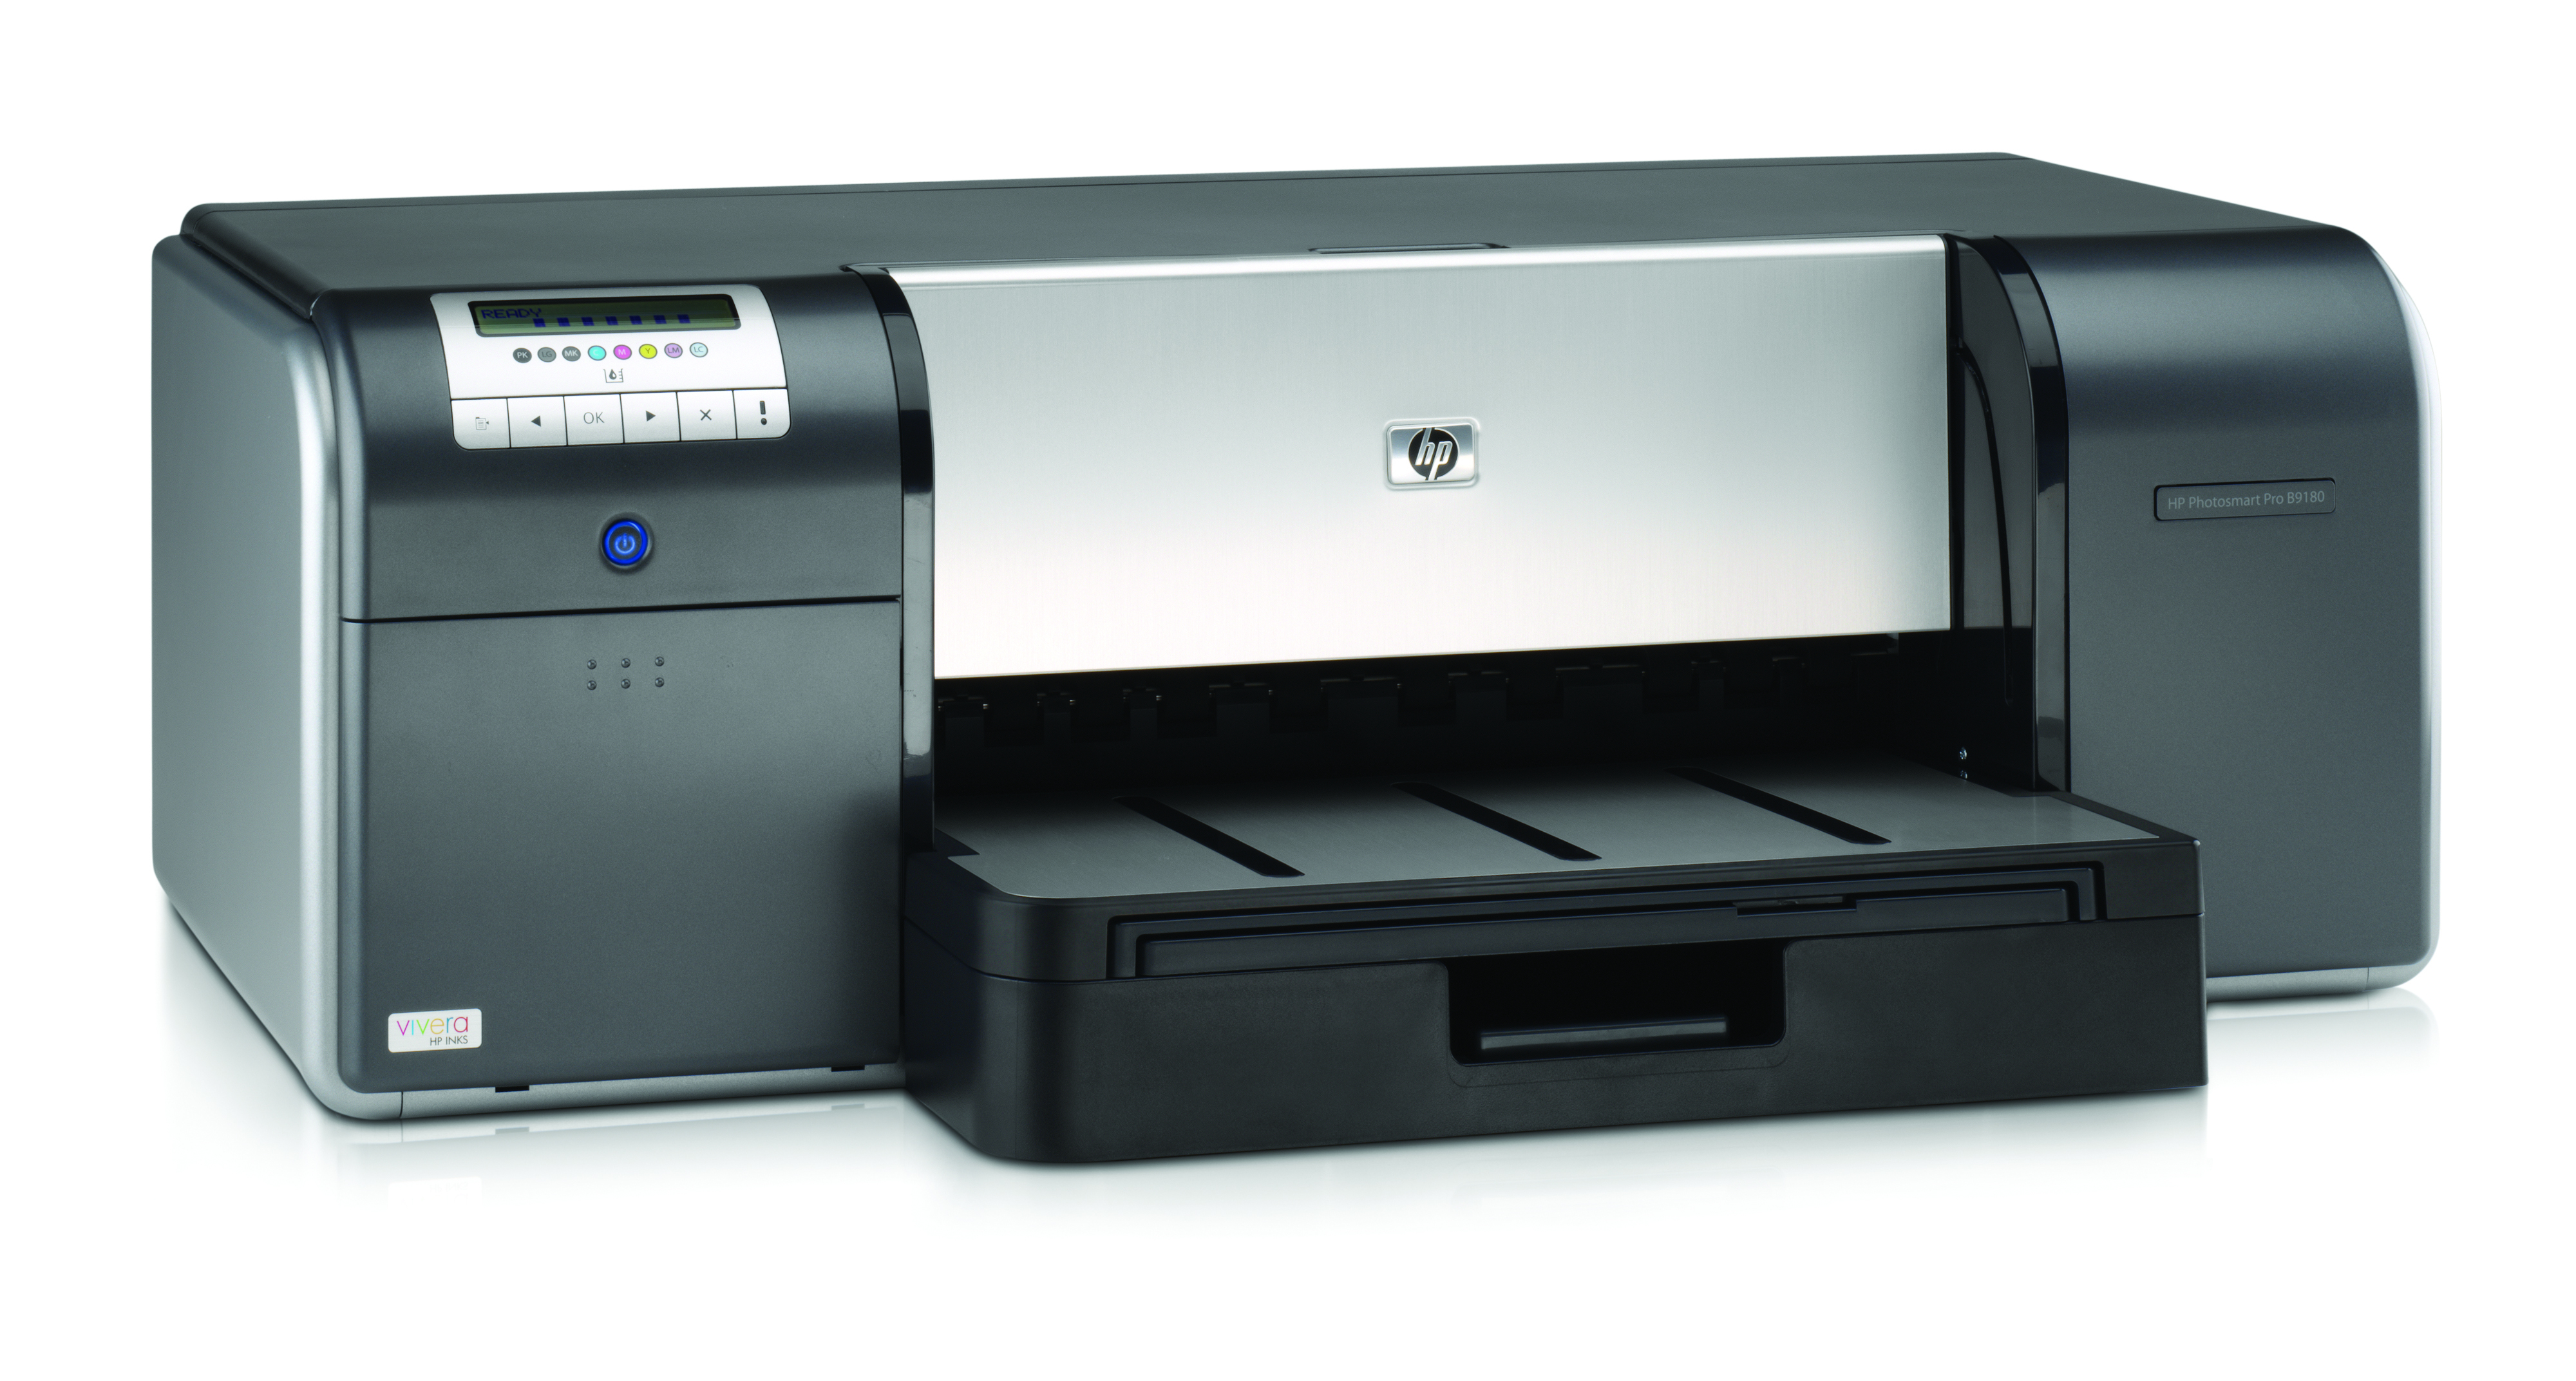
Two key equipments used were a printer and a scanner to help document our written work such as our storyboards and to scan in our shooting script and other various texts. They also helped to allow us to create copies of our work onto paper so that we can consistently create a transaction between digital and paper documents of our work. The printer we used was a 'HP Photosmart Pro B9180', whilst the scanner we used was an 'Epson Perfection V330 Photo'.

|

|

|
To allow us to document videos and images consistently throughout our project we used a DSLR camera. The camera we used was a Canon 700D with an 18-135mm STM Lens. We used this throughout various stages of our Research and Development stages such as images for our photoboards, images for our drafting and video footages of our audience research responses.

|

|
In order for the group to keep in contact we used our mobile phones to message each other consistently and create group chats with each other. This allowed us to reach each other when in need of contact with the access of mobility to communicate at any given time. Whilst preparing for our production stage, we used the steadicam known as the 'Comfort Arm Flycam 5000'. This allowed us to practise the use of it in the case that we may have used a steadicam during the filming stages of our teaser trailer. The use of mobile phones had also allowed us to contact others for our audience research and gain replies through messages.
ADOBE PHOTOSHOP CS6 - (DEVELOPMENT & PRE-PRODUCTION)

|
|

|

|
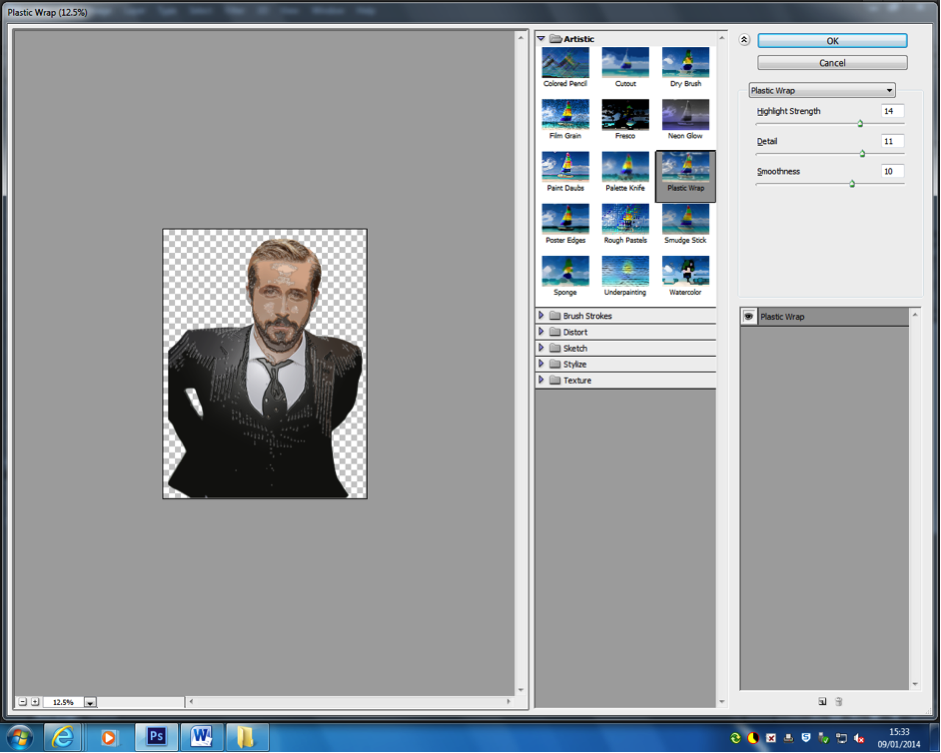
During our Pre-Production stage we used the software of 'Adobe Photoshop' to manipulate and edit images to create moodboards. Three of the key tools which we used to create the moodboards were the 'Filter' tool, the 'Opacity' tool and 'Posterise'. In addition to these tools we used the fade tool to blend images into each other. This helped us in order to create profiles for characters in a visual manner that would express the characteristics of them in an aesthetically pleasing view.


|
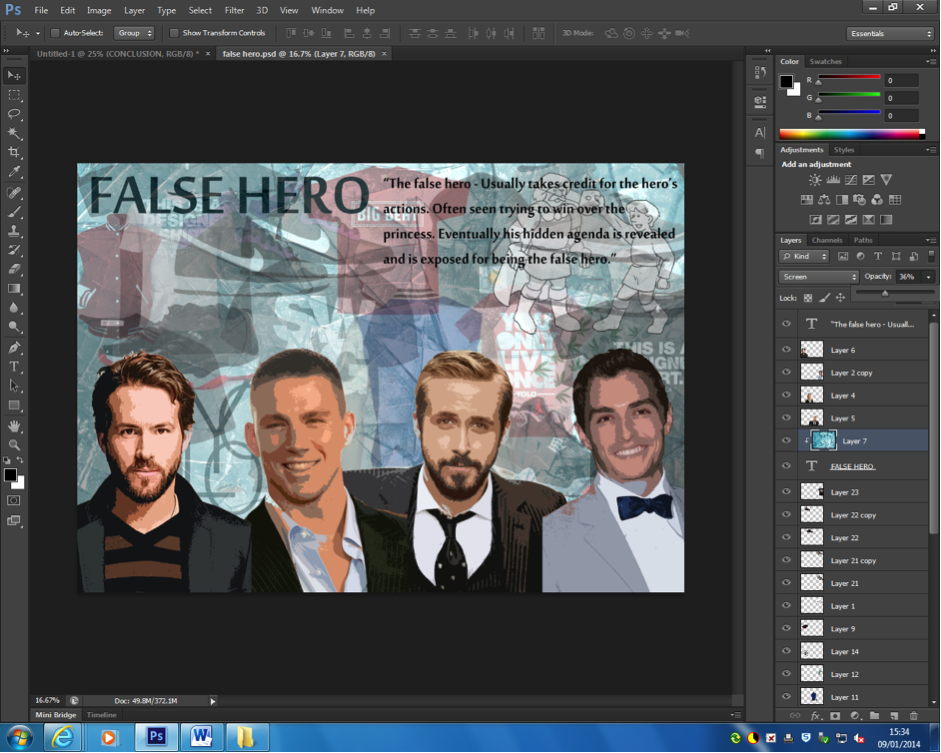
During the 'Drafting' stage of the Pre-Production, we used photoshop to create the layout of the movie poster and magazine which we would view for inspiration and ideas when creating the final product. This allowed us to experiment with ideas and push them further as we played with the composition.
|


|

|
FINAL CUT PRO X - (PRE-PRODUCTION)

|

|

|
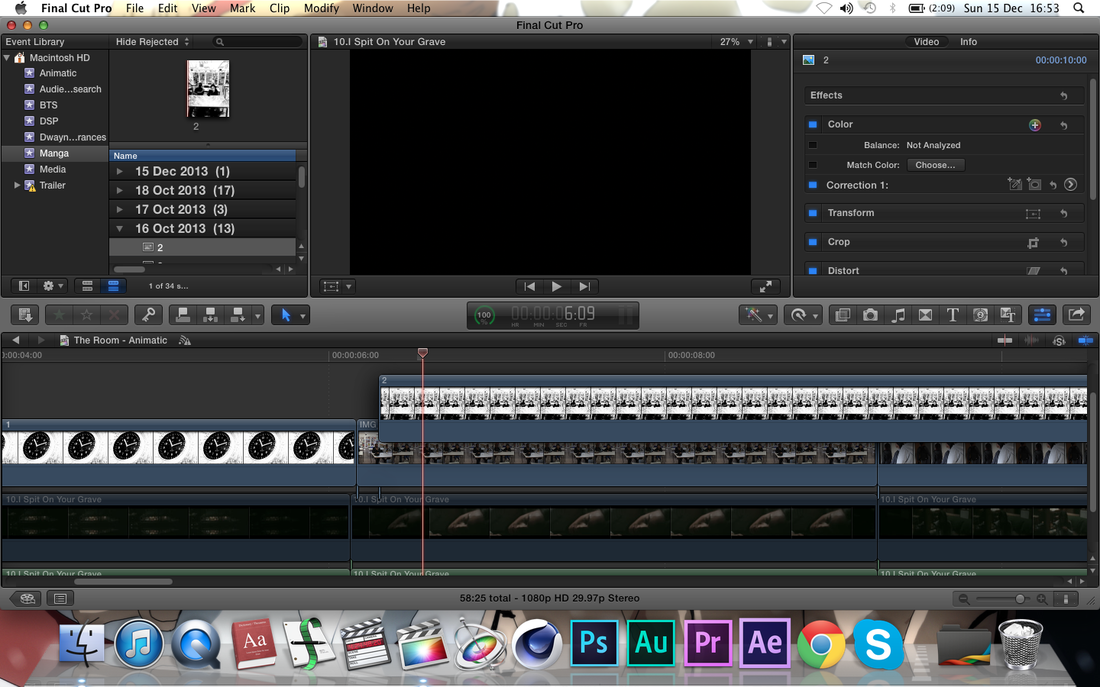
During the creation of the Animatics for the Pre-Production stage we used hand drawn images and scanned them onto a computer so that we would be able to cut it up and import it into Final Cut Pro. When creating the animatics we used Final Cut Pro X which is the new update to the previous Final Cut Pro 9. We cut and crop the images to fit into the timeframe as we followed an existing film trailer to help guide the creation of our animatic.

To help export our video footage we would use Quicktime Conversion which allows a raw video footage from 'Final Cut Pro' to be played as an mp4 of 1080p, 720p or more depending on the quality of the video. this also allows you to convert the video file into other forms depending on the use, although we would only need to use it to convert into a viewable video file.
|

|
|
|
|
To help create a branding element of our product; we created an intro to be used in the beginning of our videos so that our brand name would be noticed and acknowledged by others. We also created a tutorial to show how the introduction was made with the use of Quicktime to record our screen.
|
As we were leading up to our filming stage we found it useful to create test to help aid the recording of specific scenes of our trailer. To understand how to create this we used the aid of a tutorial as it taught us what we have done right and wrong in the creation of our effects test.
|


|
|
In addition to the 'Mirror Effect Test' we also created another test with the use of Final Cut Pro to experiment with what effects would be suitable for a CCTV footage. This helped to aid us in what was aesthetically pleasing and what was not so that we would know what to use in our trailer.
|


SOCIAL NETWORKS & APPLICATIONS - (PRE-PRODUCTION)

|

|

|

|

|
Throughout our research we used the benefits of multi-media as it allowed us to spread our work throughout social media networks and applications.
|

|

|

|
During the creation of the animatics we used the application of 'Manga Camera' manipulate our photoboard images and recreate them to take on the image of a manga. This allowed us to keep in with the japanese theme as manga is seen as a japanese art form and we were given the opportunity to create this with the use of multimedia so that we could have a manga animatic.


|

|
The use of social networking sites such as YouTube and Twitter allowed us to promote and share our products throughout the world wide web so that we could express the tools of multimedia and keep our viewers informed throughout the process to creating the final pieces. In addition to this we were able to use social applications such as WhatsApp and Instagram to share and receive advise on information regarding to our products so that we could improve our work to appeal to the intended target audience.

|
In order to help document our products we used the website known as 'QuickSurvey' to produce charts for our results from the audience researches. this was a useful tool as it allowed us to chart our evidence in an easier manner that would be automatic for us to view and visually engaging.
|
MOVIE TEASER TRAILER (PRODUCTION/ FILMING)
EQUIPMENT

|

|

|

|
In order to film our teaser trailer we used the equipments of:
- A Canon 700D Camera w/ 18-135mm STM Lens - A Velbon D-61 Tripod - A Sony VCT-R640 Tripod - A Kailite Z96 LED Light These items helped to provide video, stability and light in our teaser trailer. |
SOUNDTRACK PRO

|

|

|

|

|

|

|

|

|
|

|

|


|
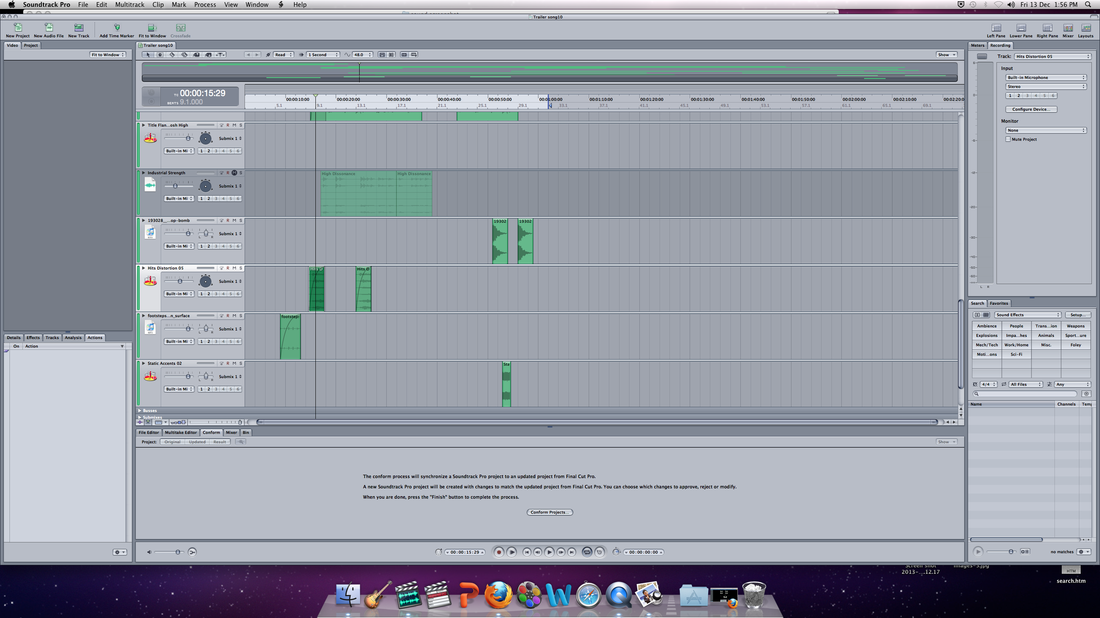
When creating the sound for our teaser trailer we used the software of 'Soundtrack Pro'. In addition to this we initially experimented with 'GarageBand' but found that we did not need to use it.
Whilst creating the soundtrack we also used free audio footages from the websites: www.freesound.org www.freesfx.co.uk They helped to provide us with suitable audio whilst we also manipulated our own audio recorded sound so that we could include 'Background SFX' and 'Foley SFX'. This allowed us to improve the audio footage of our trailer so that it would sound natural and clear throughout. This also allowed the trailer audio to be consistent throughout the duration of the video. |
FINAL CUT PRO 7 & X

The two images above are the logo's for both Final Cut Pro 7 (Left) and Final Cut Pro X (Right). In the creation of our teaser trailer we began by using the more up to date FCP X in our draft versions. However, we decided to change over to use FCP 7 as it was more suitable to use during college hours and allowed us to gain more feedback throughout the creation.

|

|

|
When adjusting the colour correction of our teaser trailer we lowered the saturation of the video so that the subjects would stand out more. As seen in the middle image above it was shown to be effective on the use of the antagonist as it allowed it to stand out and seem more pale which keeps in with the continuity of the poster and magazine. This was also effective overall as we made each footage have a similar tone and shade through the desaturation to keep it continuos throughout the teaser trailer.

|

|

These images show how we overlapped to video footages to create a fade transition so that it would express the passing of time throughout the trailer.
|


When adding effects we also used vignette to darken the edges of the video footages lightly so that it seems feathered. However, within one of the clips we used it slightly more than the rest as we needed to block out the view of a continuity error which we encountered. Although this was unsatisfactory, we were able to pull it off through the fact that it was a very fast clip which gave off a blinking effect to the audiences eyes.
Another effect used was called 'Bad TV' which gave off a fuzzy television look that roles. This was used at the end of our trailer as it would help with the jump scene and due to the fact that it is quite common in horror trailers to be seen. This use was effective as it portrayed the desired image we were going for. To finish of the editing we decided to add the 'Widescreen' effect to each of our footages so that we would achieve a more cinematic view and allow the teaser trailer to become more aesthetically pleasing as it would be viewed in the cinemas or imax. |


|
ADOBE AFTER EFFECTS CS6

|

|
|

|
|
|

|
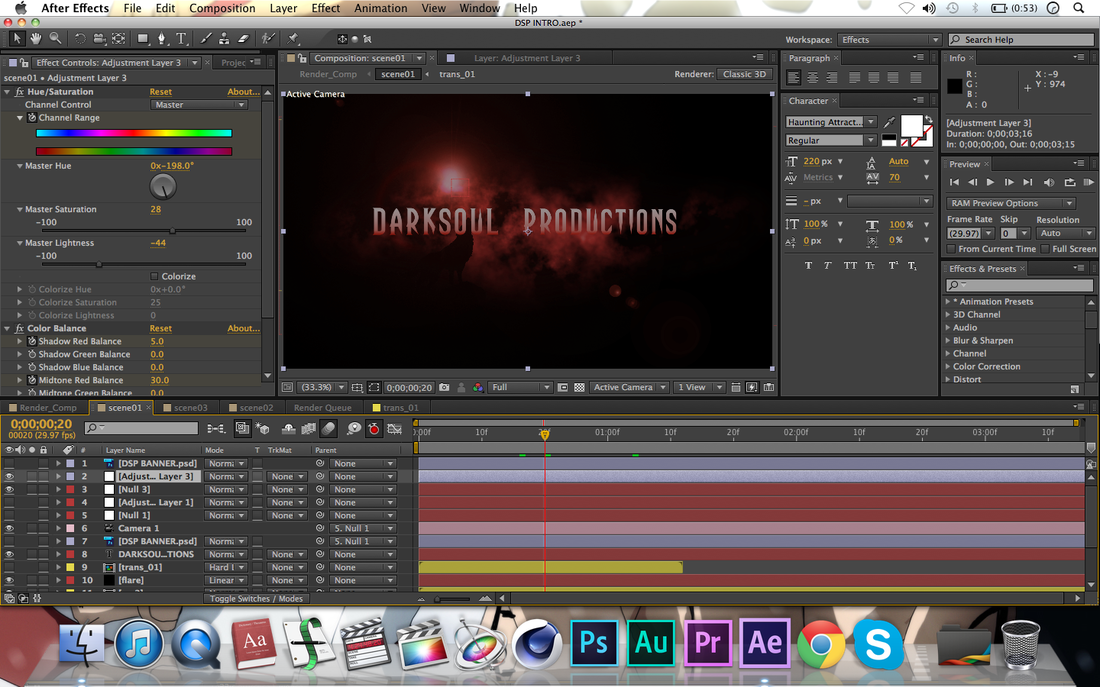
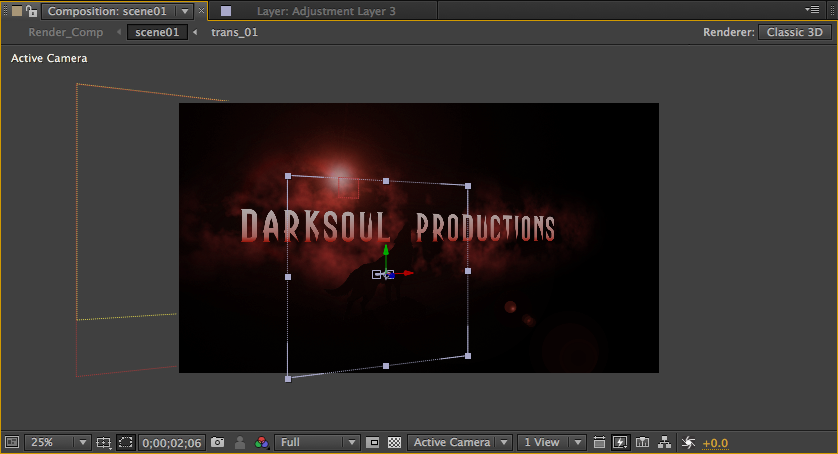
When creating the teaser trailer introduction we were originally working from a free template found online which we stripped and re-constructed to suit to our preferred image. We began doing this by deleting unnecessary layers and effects to leave only the clouds in the background and light. We then went on to create our text using our original logo font 'Haunting Attractions' to spell 'DARKSOUL PRODUCTIONS'. Once this was done we added our iconic wolf silhouette to keep within the continuity of our branding. Now that this was done we were able to re add effects that we found suitable.
When deciding to to change the original blue colour scheme to red, we created an adjustment layer so that we could play with the brightness and contrast in the colour correction. Now that this was done, we finished this off with the task of adding a 3D Layer so that it was possible for the wolf to drift along whilst the cloudy background curved into place. This was made possible by changing the camera view so that it would be noticeably visible.
With this finished all that was left is to add the iconic wolf howl which would then be added in the post-production stage of piecing the teaser trailer together.

|

|

|


|
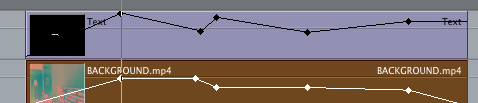
When creating the captions we once again used the help of a free template and began to strip it down to suit our needs and rebuild it. This allowed us to be able to view the textures used and view how they were blended together to create the backdrop.
As the original template was to extravagant we deleted unnecessary layers such as the red blood splatter, lights and glow. We then created an adjustment layer in addition to the darken effect so that the texture would give off a more grunge like image which we would prefer. This was also possible through changing the colour correction to adjust the brightens and contrast to make the texture display a darker tone whilst remaining effective. Finally, we added a vignette effect so that we could minimise the focus of the texture and darken the edges in an oval like shape. We then blurred this effect so that it slowly faded into the center to give focus to that position. |


|

|

|

|

|

|

|
When creating the title caption we also did the same as we did in the caption texture by stripping and rebuilding the texture again with slightly more light so that it remains slightly different whilst keeping in with the continuity. However, when creating the movement of the text we gave it a 3D Layer and rotated it within a key frame so that it gives off the illusion that it is falling into place as it goes along with the soundtrack. When creating the 3D Layer we used the pen tool to center where the text would fall neatly into place whilst having a shaken movement.
This is the final outcome of the the title caption with the audio from the trailers soundtrack.

|
|
Whilst the 'Coming Soon caption' has the same the same texture as the generic captions background we have altered the text. As seen in the video we have given the text 'COMING SOON' a slight shake as it zooms outwards so that it seems distorted whilst remaining subtle. In addition to this we have also given a Typewriter effect to the 'www.darksoulproductionsweebly.com' so that it would be slightly different to the 'COMING SOON', but still have a sense of subtlety to finish off the teaser trailer. This was effective as it fades in towards the end and draws the audiences attention away from the main text of 'COMING SOON.'

|

|

|
When creating the 'Mirror Scene' in the teaser trailer we began by merging two videos together to create the illusion that the antagonist is supernatural.

|


|
We began this by using the pen tool to cut the specified area which was wanted and crop into the other footage. This then enabled us to use the mask tool to create a Mask Path between the two videos and feather the footage down along with the opacity.

|

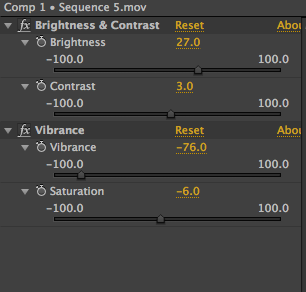
Once the masking was completed we faced the daunting task of correcting the lighting so that the footage would become realistic. This problem had arisen in the filming stages as the lighting began to ran out of battery power and die out. This meant that we had to use the Colour correction and adjust the brightness and contrast between the two video footages. In addition to this we also had to adjust the vibrance drastically by decreasing it and desaturating the antagonist footage slightly. this allowed the two footages to match more closely and blend within each other more realistically within the teaser trailer.
|
MOVIE MAGAZINE & POSTER (PRODUCTION)
EQUIPMENT & PHOTOSHOOT

|

|
In order to take photographs for our film poster and magazine we used the equipments of:
- A Canon 700D Camera w/ 18-135mm STM Lens
- A Kino Flo LED Light Kit
These items helped to provide the best lighting possible and a very clear image to use of professional quality.
- A Canon 700D Camera w/ 18-135mm STM Lens
- A Kino Flo LED Light Kit
These items helped to provide the best lighting possible and a very clear image to use of professional quality.
ADOBE PHOTOSHOP CS6
|

|

|

|

|

|

|
|

|

|
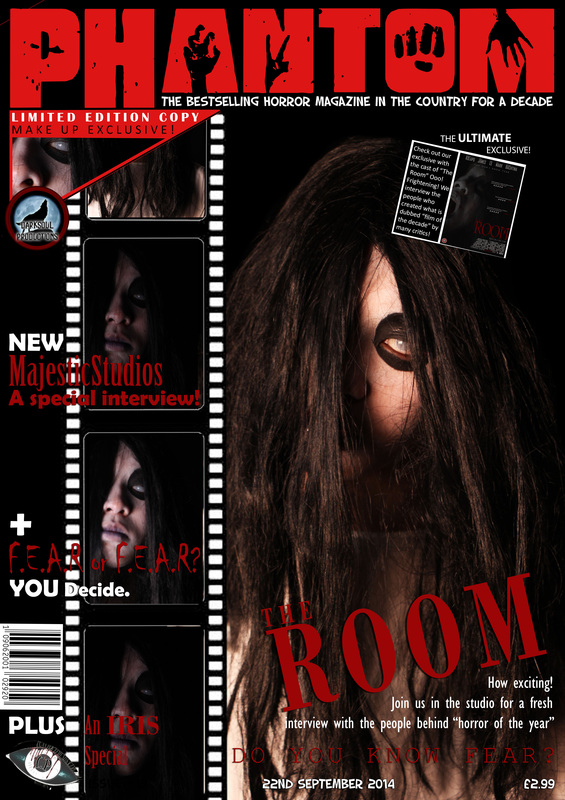
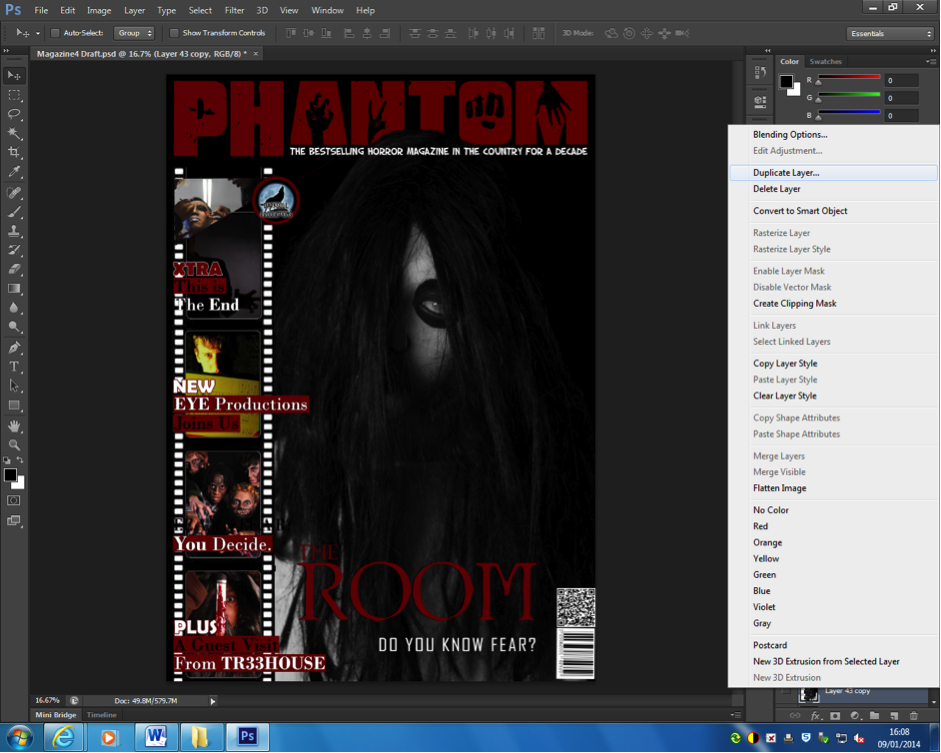
When creating the horror magazine we followed the general conventions of an existing horror magazine using examples of real media texts. We used a structured layout to keep the magazine simple and effective, whilst structured and engaging. To create the masthead we used a 'Shawn of the dead' type font to allow the letters to stand out amongst other magazines. In addition to this it allowed us to keep in with the horror theme as the letters contained monster hands and fist prints. When developing this piece we had trouble with the images as the photograph was to bright. to tackle this issue we had used the contrast and saturation tool to allow the subject to become more pale; as seen in the poster and trailer. This allowed continuity to be kept throughout all pieces and gave it a professional quality. The font for the main cover line is also kept the same throughout all the pieces as it features 'The Room'. In the creation of the photographs along the left third we used the crop and mask tool so that the images would seem like they are part of the film strip that goes along and look neat. This was effective as it allows the reader to distinguish this as a film magazine and separate from others.

|


|

During the creation of the horror poster we have decided to keep with the colour scheme of black, red and white. In order to edit the image we used the filter effect to enable the image to be viewed in 'black and white' and 'de-saturate' the colours. This allowed the image of the antagonist to become more menacing. We also used a font called 'SteelTongs' to allow our texts containing the crew to look professional and keep in with the conventions. In addition to the cast names, they were given a larger text size for their last names in white, with their forenames written above in red and slightly smaller. This also kept within the conventions of a real horror poster and kept continuity consistent throughout.
|
CONCLUSION
Overall, technology has played a key role in the project and creation of our final products as a whole. They have enabled us to create pieces of work in a much simpler fashion and has also expanded our capabilities of production with the use of equipments and softwares. the use of the internet has allowed us to gain a vast range of knowledge on our horror genre and final products as it would have been more difficult to create and share our work as a whole. In addition to this the use of Macs has also helped as they specialise in editing and manipulating videos and images which we found very useful. To add to this the equipment of cameras and tripods allowed us to create consistency throughout the video as we had access to many cameras of the same brand. Finally, the softwares made available played one of the biggest parts in the creation of our final products as without the use of 'Final Cut Pro' and 'Adobe Photoshop' we would have never been able to create our products to a high standard as these softwares are used by professional and experts of the craft of editing in video and images. To conclude the inclusion of media technologies in the construction, research, planning and evaluation stages has made life a lot easier for the group by giving us access to a wealth of new techniques and a plethora of knowledge in the use of media technologies to their maximum capabilities.
